Visual inspection of structural assets
On an average industrial working day, the asset assessment is extremely important for the evaluation of the current state of the structure, focusing on eventual non-compliance and flaws before they can originate catastrophic accidents, production halts or other inconveniences.
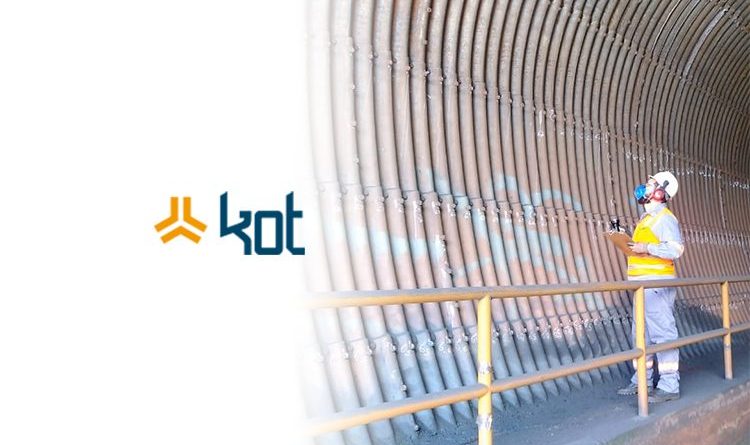
Whilst assessing the assets in use, it is very important to carefully analyse the whole structure, aiming at identifying the existing pathologies. A detailed and methodical analysis allows the identification of non-compliance and risks, also raising potential reasons and causes for them, as well as predicting eventual solutions.
Why carrying out a visual assessment?
Within the national industrial park, several structures have been supporting assets’ processing and their structural integrity can ensure the production process occurs without interruptions and will mitigate the risks of undesirable events with the employees involved. Looking at the mineral process, for instance, structural failures in equipment such as conveyors belts, warehouses, process buildings, yard machines, wagon flippers and ship loaders are of vital importance for the production process to take place. Therefore, any structural failures in this equipment can be catastrophic.
In many industrial situations, due to various factors, the structural integrity of an asset is not taken seriously enough. Considering immediate production consequences, system and mechanical failures require immediate attention. However, the consequences of a catastrophic failure in a structure are unpredictable, leading to long and expensive maintenance and undesired deadly accidents.
KOT considers structural inspections an indispensable part of a daily journey, promoting the integrity of our clients assets. Known as the second stage of the CARE (acronym for Asset Control for Structural Revitalization) methodology, the structural inspection was developed in order to offer an engineering-based solution to promote the required attention to our clients’ assets, As explicitly stated on its name, the focus is caring of assets promoting their structured control and relieving the risks associated to the use of equipment and structures.
In addition to the good training and preparation of those who are carrying out the test, the success in carrying out the structural visual inspection will depend on some important factors: tools, equipment and instruments that will be used, characteristics of the object under analysis and available lighting.
Thus, visual inspection is the lowest cost method that can be used in the structural integrity journey of the asset. The method is not and should not be the only one to be used in this journey, but its use allows users to point out the need to use other forms of evaluation, as in Figure 1. It can be followed by:
- Non-destructive tests, i.e.: ultrasound, penetrating liquid, magnetic particles and x-ray;
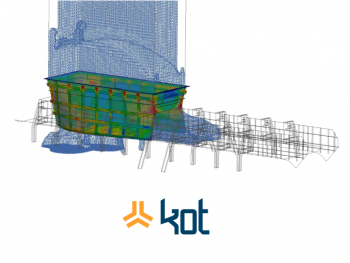
- Verification through Finite Elements Method;
- Instrumentation of the asset through extensometry and accelerometry;
- Risk Assessment.
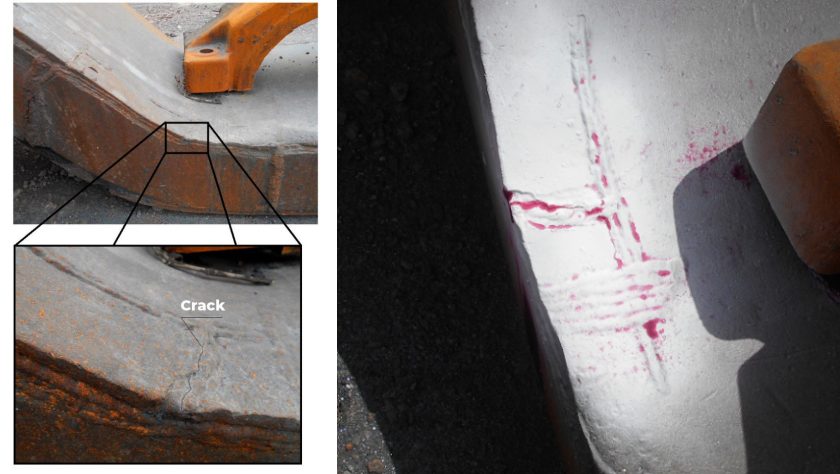
Furthermore, as means to provide support to the visual inspection, tools like drones, scaffolding, platforms, industrial climbing material, borescope, among others.
Main causes of structural damage
In order to start the structural inspection properly, it is recommended to know the causes of damage to the structures. Metallic structures of industrial assets, in general, are affected by climate, the environment and their use. It is then possible to establish which inspection techniques are applicable.
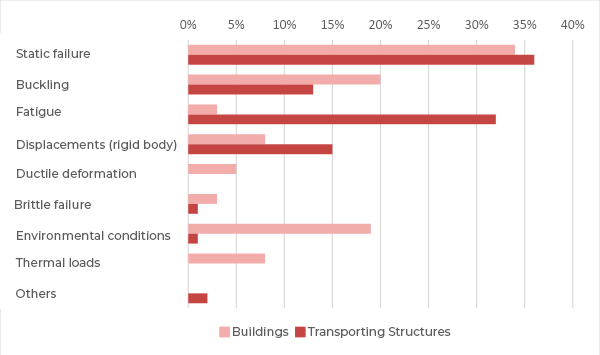
Research on this subject is extensive. For instance, according to the technical study by OEHME (1989), considered by the EUROCODE standard commission, the causes of damage to metal structures in buildings and conveyor belts can be grouped according to Graph 1.
In the national park, metal and concrete structures from small to large, such as piers, tunnels, OAEs (Special Works of Art, such as viaducts, bridges, bridges and footbridges), buildings, etc. suffer due to bad weather and corrosive atmosphere (factors such as high rainfall and deposition of chlorides and particulates) favor the emergence of pathologies and flaws.
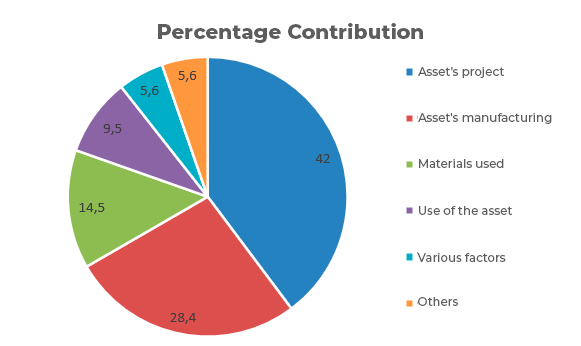
Temperature variations, heavy rains, pollution and a highly aggressive environment promote pathologies related to forms of structural deterioration. According to HENRIQUES (2001), the causes of pathologies in general civil construction assets (can be seen in Graph 2).
Additionally, considering day-to-day experiences in the field, it can be said that a large part of structural failures are due to mistakes during the design phase, failures during assembly, non-conformities in manufacturing and issues of use of the asset (operating conditions and maintenance). In order to expose the most frequent structural pathologies in metallic structures and their respective main causes, an interesting understanding was proposed by PRAVIA and BETINELLI (2016) This understanding can be seen in Table 3.
| Metallic Structure Pathologies | Main causes |
| Punctual corrosion | Deficiency caused by inadequate drainage of rainwater and errors in construction details, resulting in puddles, accumulation of moisture and aggressive agents such as deposition of chlorides and particulates (ore, pollution, soot, etc.). |
| General corrosion | Deficiency caused by unsuitable protection against diverse corrosion processes. |
| Excessive deformation | Deficiency caused by overload and/or thermal effects which were not considered as premises in the original project (supply specifications, conceptual designs, average and detailed). |
| Global and local buckling | Deficiency caused by the use of structural models that are not correct and that do not reproduce reality and/or that do not comply with the standards for verifying stability and rigidity. |
Thus, the causes of several structural non-conformities may vary, eventual project failures can have their risks minimized by performing a structural asset audit. Also known as design review or double check, the following activities are carried out:
- Support in the development of technical specifications;
- Technical assessment of the proponents;
- Average project suggestions;
- Verification of the equipment via Finite Elements Method;
- Proposition of solutions and eventual reinforcements for the encountered non-compliances.
How to perform a visual inspection
The visual inspection test can be divided into two forms: direct and indirect. On the first, the naked eye and optical auxiliary equipment such as magnifying glasses, microscopes, borescopes and binoculars can be used. In the second, indirect, the use of auxiliary vision tools is mandatory, through the use of some method of artificial vision.
Overall, the visual inspection is composed of the following stages:
- Structure assessment carried out together with the technical drawing evaluation of the project. For such, the visual inspection of the structure aims at identifying the absence of screw in corrosion points of the assets, visible plastic deformations of sheets and profiles, visible cracks and other detectable non-conformities. Photos and videos can serve as a record of the faults found;
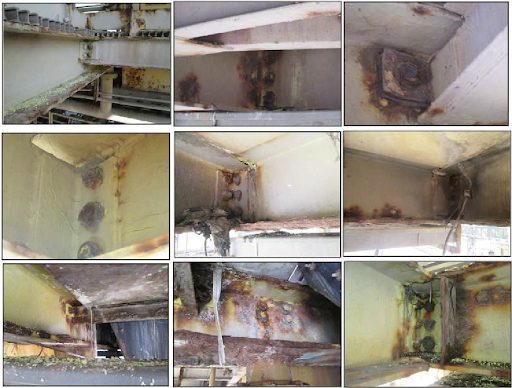
- Classification of the unconformities and of the deviations found in regards to the actions’ criticity and indications;
- Preparation of technical report, highlighting the checks carried out and indicating the non-conformities detected. The detail of the report should vary according to the complexity of the document or the client’s requirements. Often, an inspection of the object may be governed by specific rules, designated laws or by the customer’s own procedures
- Finally, action suggestions to mitigate the found issues.
Main advantages and limitations
The use of the visual test methodology has the advantage of reduced cost, the quick way that the test can be performed, the more simplified interpretation when compared to other test methods and the ease of execution.
On the other hand, there are limitations, among them, the possibility of detecting discontinuities only on the surface of the structural element should be highlighted, limiting the detection of internal cracks. It is also necessary to ensure good visual acuity by the tester and prior knowledge of the object under analysis.
Futurelly, it is important to pay attention to what is recommended by CHA (2018) for OAEs, and what also applies to other structural assets. In this exposition, visual changes in civil infrastructure, such as cracks or corrosion, are very important to warn about structural health conditions. Despite the critical roles of bridges in public security and the economy, inspection based on human vision has limitations and disadvantages already mentioned.
Thusly, Engineering will constantly seek the automation of visual inspections to solve the limitations of the common human visual approach. Researchers and companies are increasingly attracted to the development of computer-based methods for detecting structural damage. KOT can provide customers with visual testing options through human intervention, as well as computer vision methods to promote the integrity of our customers’ assets, using, for instance, image treatment.
Get in touch with KOT’s specialists team!

Aender Ferreira
Mechanical Technician from CEFET-MG, Mechanical / Aeronautical Engineer from UFMG and Master in mechanical projects from the same university. Before graduation, he had experiences in the mining, maintenance, project design, experimental engineering and automotive industries. As an Engineer, he started his career in the maintenance sector performing calculus activities for fatigue in aeronautical components and structures. Subsequently, he was invited to compose the Board of Directors of KOT Engineering, working in the commercial sector of the company, helding the position for almost 15 years.
References:
OEHME, Peter. Analyse von Schäden an Stahltragwerken aus ingenieurwissenschaftlicher Sicht und unter Beachtung juristischer Aspekte. 1989.
HENRIQUES, F. M. A. Noção de Qualidade em Edifícios. Comunicação ao Congresso Nacional da Construção. Lisboa, 2001.
PRAVIA, ZMC; BETINELLI, E. A. Falhas em estruturas metálicas: Conceitos e estudos de caso. Curso de Engenharia Civil da FEAR–UPF, 2016.
CHA, Young Jin et al. Autonomous structural visual inspection using region‐based deep learning for detecting multiple damage types. Computer‐Aided Civil and Infrastructure Engineering, v. 33, n. 9, p. 731-747, 2018.




Leave a Reply